
Buying or selling a home is a significant milestone, and the home inspection provides a vital glimpse into the property’s true condition. Whether you’re a first-time buyer, a seasoned mover, or getting ready to list your home, knowing what to expect during a home inspection can help you feel calm, confident, and prepared. In this guide, we’ll explore what inspectors look for, how to prepare, common issues that arise, and practical tips for negotiating repairs and making informed real estate decisions.
The home inspection process can feel overwhelming, especially when you’re already managing the complexities of buying or selling real estate. However, understanding this crucial step transforms what might seem like an intimidating procedure into a valuable opportunity to make informed decisions about one of life’s largest investments. This comprehensive guide will walk you through every aspect of the home inspection process, from initial preparation through final negotiations.
Home Inspection vs. Appraisal: Understanding the Difference
Many homebuyers confuse these two essential processes, but understanding their distinct purposes is crucial for setting proper expectations:
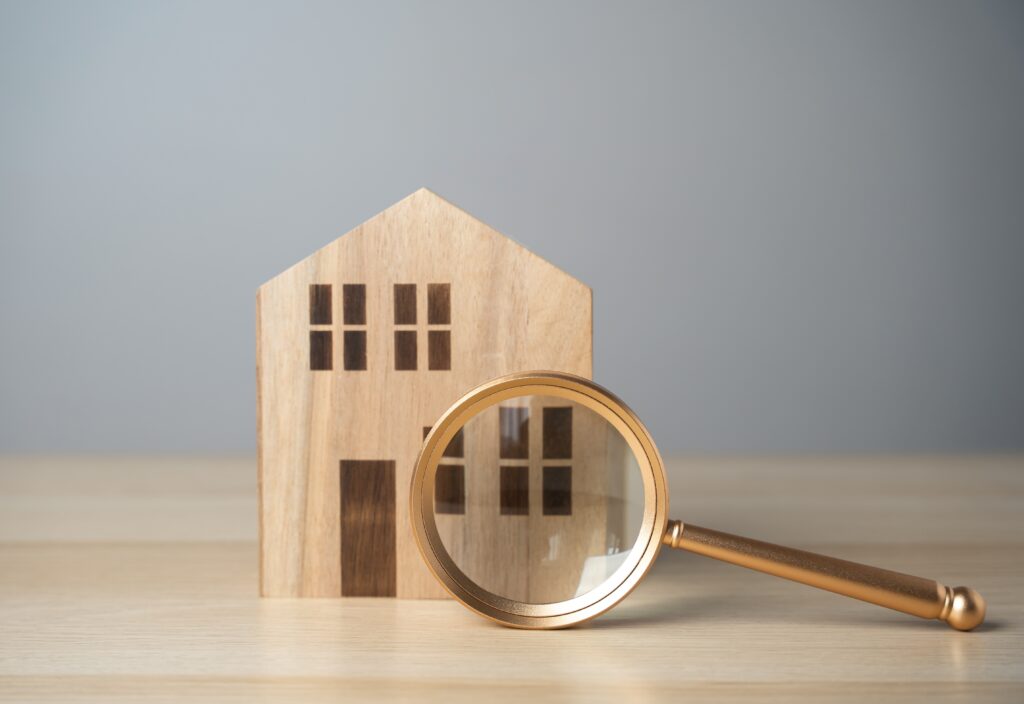
Home Inspection: This is a comprehensive evaluation of a home’s condition and safety conducted by a licensed inspector. The main goal is to identify defects, maintenance needs, and potential hazards. The inspection typically costs between $300-$600 and takes 2-4 hours to complete. The resulting report becomes your roadmap for understanding the property’s true condition and can serve as a powerful negotiating tool.
Appraisal: This assessment determines the market value of a home, typically required by lenders. It helps them understand how much they are willing to finance. An appraiser focuses on comparable sales, market conditions, and overall property value rather than specific defects or maintenance issues.
While both are essential, they serve different purposes—one protects your understanding of the home’s condition, while the other safeguards the lender’s valuation. For example, a home might appraise for $400,000 based on recent comparable sales, but the inspection could reveal a $15,000 roof replacement need that wasn’t apparent during your initial walkthrough.
What Inspectors Look For
A home inspection is a visual and non-invasive assessment. Inspectors won’t cut into walls or move heavy furniture, but they will examine major systems and accessible areas. Here are the key areas they focus on:
Structural Components and Foundation
Inspectors examine the home’s bones, looking for signs of settling, cracks, uneven floors, or moisture in the basement or crawlspace. They’ll check foundation walls for bowing, cracking, or water intrusion. In the basement, they’ll look for efflorescence (white chalky deposits that indicate water issues), proper support beam placement, and adequate ventilation. For example, hairline cracks in concrete are typically normal settling, but horizontal cracks or stair-step patterns in masonry could indicate more serious structural movement requiring professional evaluation.
Roof and Attic Systems
The roof inspection includes assessing the age and condition of shingles, flashing around chimneys and vents, gutters, downspouts, and overall drainage systems. In the attic, inspectors evaluate insulation levels (typically measured in R-values), ventilation adequacy, and signs of leaks or pest intrusion. A 20-year-old asphalt shingle roof, for instance, might show granule loss and curling edges, indicating it’s approaching replacement time within the next 3-5 years.
Exterior Elements
Inspectors check siding materials for damage, proper installation, and maintenance needs. They examine windows and doors for proper operation, weatherstripping condition, and seal integrity. Grading and drainage around the foundation receive special attention, as improper water flow can lead to expensive foundation problems. Decks, steps, and railings are tested for stability and code compliance.
Electrical Systems
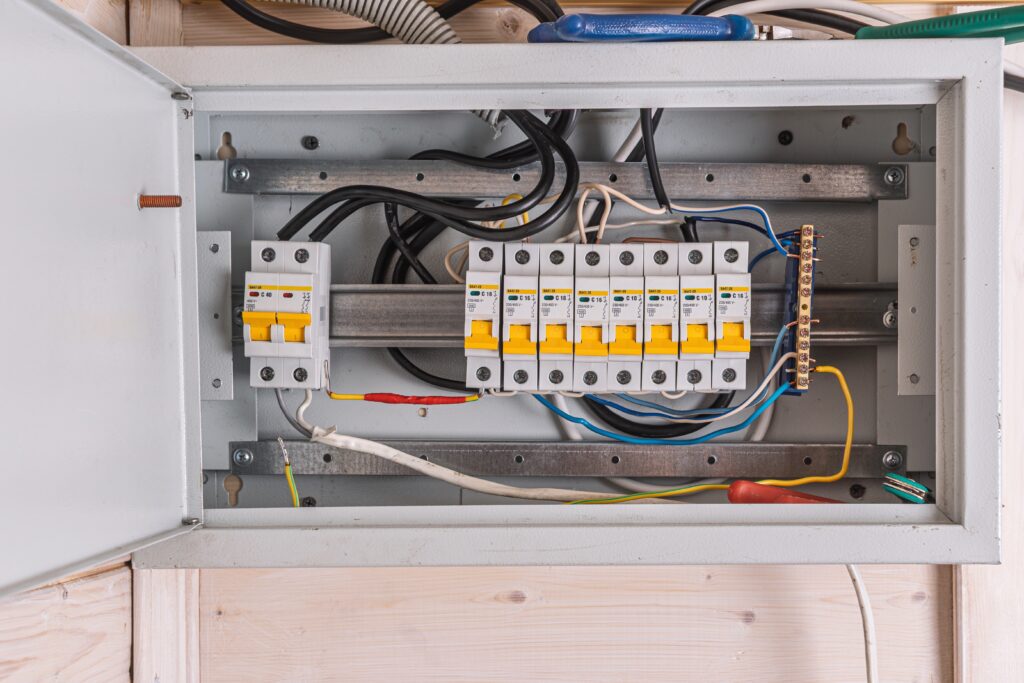
The electrical evaluation covers service size (many older homes have inadequate 100-amp service), panel condition, breaker functionality, GFCI and AFCI protection in required areas, wiring type and condition, and visible safety concerns. For example, homes built before 1960 might have knob-and-tube wiring that insurance companies won’t cover, or aluminum wiring from the 1960s-70s that poses fire risks without proper connections.
Plumbing Infrastructure
Plumbing assessment includes supply and drain line materials and condition, water pressure testing, water heater age and performance, visible leaks, and shutoff valve accessibility. Galvanized steel pipes common in pre-1960 homes often show significant corrosion by now, while polybutylene pipes from the 1980s-90s are prone to failure and may affect insurance coverage.
HVAC Performance
Heating and cooling system evaluation covers equipment age and condition, filter maintenance, proper venting, ductwork condition, and overall performance. A 15-year-old furnace might be functioning well but approaching the typical 15-20 year lifespan, helping you budget for future replacement.
Interior Conditions
Inside the home, inspectors examine walls, ceilings, floors, doors, windows, and stairs for proper function and signs of problems. They look for moisture indicators, mold growth, pest evidence, and general maintenance needs. For instance, water stains on ceilings could indicate past or ongoing roof leaks requiring investigation.
Safety Features
Critical safety elements include handrail presence and stability, smoke and carbon monoxide detector functionality, garage door auto-reverse mechanisms, stair safety, and general trip hazards. Missing or non-functional smoke detectors in bedrooms, for example, represent immediate safety concerns requiring prompt attention.
Specialized Inspections
Depending on the property type, age, and location, additional inspections might include pest and termite evaluations, radon testing, sewer scope inspections, septic system evaluations, chimney assessments, or pool and spa safety checks.
Preparing for the Inspection: Tips for Buyers and Sellers
For Buyers: Setting Yourself Up for Success
Choose a Reputable Inspector: Research potential inspectors thoroughly by checking licensing status, professional certifications (such as ASHI or InterNACHI), online reviews, and asking for sample reports to assess their thoroughness and clarity. A quality inspector should provide detailed reports with photographs and clear explanations of findings.
Schedule Promptly: Your purchase contract likely includes an inspection contingency with specific deadlines—typically 7-10 days from contract acceptance. Acting quickly preserves your negotiating power and allows time for specialized inspections if needed. For example, if the general inspection reveals potential foundation issues, you’ll need additional time for a structural engineer’s evaluation.
Attend the Inspection: Being present for at least the final walkthrough and summary allows you to see issues firsthand, ask questions, and gain valuable insights about the home’s systems and maintenance needs. This is your opportunity to learn about the home’s quirks and understand how to operate various systems.

Bring Essential Items: Pack a notepad, flashlight, camera, and comfortable clothes for crawling in tight spaces. Focus your attention on major concerns like roof condition and age, electrical safety issues, plumbing materials and functionality, HVAC life expectancy, drainage problems, and evidence of previous repairs.
Arrange Proper Access: Coordinate with the seller or listing agent to ensure all areas are accessible, including attic spaces, garage areas, mechanical rooms, crawlspaces, electrical panels, and any locked areas. Confirm that utilities will remain on during the inspection.
For Sellers: Making a Positive Impression
Declutter and Organize: Clear spaces around the furnace, water heater, electrical panel, attic access, and under-sink areas. Replace burned-out bulbs throughout the house, as dark areas can hide problems and create negative impressions. Remove stored items from mechanical rooms and ensure easy access to all systems.
Address Minor Maintenance: Change HVAC filters, test and replace batteries in smoke and carbon monoxide detectors, install missing GFCI outlets where required by current codes, repair minor leaks or drips, and tighten loose hardware. These small investments can prevent minor issues from appearing as major problems in the report.
Document Your Maintenance: Gather receipts and documentation for roof repairs, HVAC servicing, water heater replacement, sewer line work, pest treatments, and any existing warranties. This transparency builds buyer confidence and can justify your asking price.
Prepare the Property: Secure pets in a comfortable location away from the inspection activity, ensure all utilities remain connected and functioning, relight any pilot lights that may have gone out, and consider vacating during the inspection to give the buyer and inspector space to work efficiently.
What Happens During the Inspection
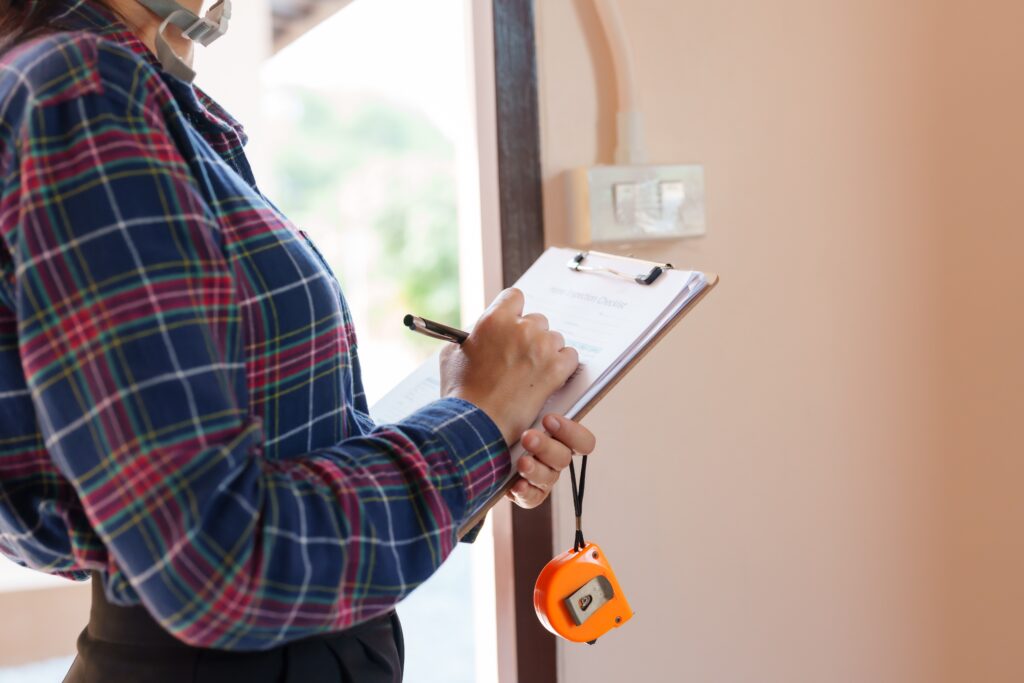
Most inspections last between 2 to 4 hours, depending on the home’s size, age, and complexity. Here’s how the process typically unfolds:
Initial Exterior Assessment (30-60 minutes): The inspector begins outside, examining grading and drainage patterns, siding condition and installation, roof condition (viewed from ground level or ladder), gutters and downspouts, decks and outdoor structures, and entry points for pests or moisture.
Interior and Attic Evaluation (60-90 minutes): Moving inside, the inspector examines each room systematically, testing windows and doors, checking walls and ceilings for cracks or stains, evaluating flooring condition, and accessing the attic to assess insulation, ventilation, and structural elements.
Major Systems Testing (45-75 minutes): The inspector reviews electrical panels and visible wiring, tests plumbing fixtures and water pressure, operates HVAC equipment and checks ductwork, and evaluates the water heater and other mechanical systems.
Built-in Appliance Check (15-30 minutes): Basic operation testing of dishwashers, garbage disposals, built-in microwaves, and other included appliances (coverage varies by inspector).
Final Summary Discussion (15-30 minutes): Many inspectors provide a verbal recap of significant findings, allowing immediate questions and clarification before the written report arrives.
As a buyer, your role involves observing the process, asking relevant questions about systems and maintenance, taking notes on significant findings, and maintaining realistic expectations. Remember, every inspection reveals some issues—focus on health, safety, and major system concerns rather than cosmetic imperfections.
As a seller, it’s generally best to vacate during the inspection, allowing the inspector to work efficiently and giving the buyer space to process information privately with their agent.
How to Read and Interpret the Inspection Report
Inspection reports can span 20-50 pages, containing detailed descriptions, photographs, and sometimes severity ratings. Organize your response by categorizing findings into priority levels:
Immediate Safety Hazards: Exposed electrical wiring, missing stair handrails, non-functioning smoke or carbon monoxide detectors, gas leaks, active mold growth, or structural instability. These issues require prompt professional attention and often become deal-breakers if not addressed.
Major Systems and Structural Concerns: Roofs nearing replacement time, foundation movement or significant cracking, outdated electrical panels, failing HVAC systems, or substantial plumbing problems. These typically involve costs of $3,000 or more and significantly impact the home’s value and livability.
Maintenance and Monitoring Items: Minor leaks, aging caulk and weatherstripping, slow drains, loose hardware, missing splash blocks, or worn flooring. These issues are manageable and often expected in older homes.
Informational Items: Normal wear appropriate for the home’s age, recommendations for monitoring certain conditions, suggestions for efficiency upgrades, or general maintenance tips. These don’t typically affect negotiations but provide valuable homeowner information.
Common Issues and Their Implications
Understanding frequently encountered problems helps set realistic expectations:
Roofing Concerns: Curling or missing shingles, granule loss, damaged flashing, or clogged gutters often indicate aging systems. A roof showing significant wear might need replacement within 2-5 years, representing a $8,000-$20,000 investment depending on size and materials.
Drainage and Grading Problems: Poor drainage can cause water to pool around foundations, leading to basement flooding, foundation damage, or landscape erosion. Solutions might include extending downspouts, regrading soil, or installing drainage systems, typically costing $500-$5,000.
Electrical Safety Issues: Older panels, double-tapped breakers, missing GFCI protection, or aluminum wiring can pose fire risks. Electrical updates often cost $1,500-$8,000 but are crucial for safety and insurance coverage.
Plumbing Indicators: Slow drains, low water pressure, corroded pipes, or aging water heaters signal potential system failures. Whole-house repiping can cost $8,000-$15,000, while water heater replacement runs $1,200-$3,000.
HVAC End-of-Life Signs: Systems approaching 15-20 years often show decreased efficiency and increased repair needs. Replacement costs typically range from $4,000-$12,000 depending on system type and home size.
Insulation and Ventilation Deficiencies: Inadequate attic insulation or ventilation affects energy efficiency and can cause ice dams or moisture problems. Improvements usually cost $1,500-$4,000 but provide ongoing energy savings.
Essential Home Inspection Tips for Buyers and Sellers
Focus on Function Over Form: Prioritize safety and major system functionality over cosmetic issues like paint colors or outdated fixtures that you can easily change.
Understand System Lifecycles: Learn the typical lifespan of major components—roofs (15-25 years), HVAC systems (15-20 years), water heaters (8-12 years), and windows (15-30 years)—to budget for future replacements.
Consider Specialized Testing: Based on the home’s age, location, and initial findings, additional inspections for radon, termites, sewer lines, septic systems, or chimneys might be warranted.

Get Professional Estimates: For major findings, obtain written estimates from licensed contractors before entering negotiations. This provides concrete numbers for discussions and helps avoid surprises.
Think Long-term: Consider whether you prefer seller credits for future repairs or having work completed before closing. Credits offer more control over contractor selection and repair quality.
Respect Contingency Timelines: Inspection contingency periods vary by contract and local customs, typically ranging from 7-14 days. Missing deadlines can forfeit your negotiating rights.
Negotiating Repairs or Credits: Smart Strategies
Post-inspection negotiations should be fair, focused, and based on documented findings.
If You’re the Buyer
Prioritize Strategically: Focus requests on safety hazards, major system defects, and items affecting the home’s value or insurability. Sellers respond more favorably to significant concerns than cosmetic wish lists.
Obtain Professional Estimates: For major repairs like roofing, HVAC replacement, or structural work, secure written estimates from licensed contractors. This provides concrete negotiating numbers and demonstrates the issue’s scope.
Choose Your Negotiating Approach: Decide between requesting actual repairs, cash credits at closing, or purchase price reductions. Each approach has advantages—repairs ensure work completion, credits provide contractor choice, and price reductions might offer tax benefits.
Be Reasonable and Realistic: Remember that sellers aren’t responsible for normal wear and tear appropriate to the home’s age. Focus on items that weren’t apparent during your initial viewing or that pose safety concerns.
Consider Market Conditions: In competitive seller’s markets, extensive repair requests might prompt sellers to choose other offers. In buyer’s markets, you may have more negotiating leverage.
If You’re the Seller
Evaluate Requests Objectively: Consider the legitimacy of buyer requests, the cost of addressing issues versus potential deal loss, and your timeline constraints for completing work.
Get Your Own Estimates: Don’t automatically accept buyer estimates. Obtain quotes from your preferred contractors, who might provide more reasonable pricing or alternative solutions.
Negotiate Strategically: Consider offering credits instead of completing repairs yourself, which eliminates timeline pressure and potential quality disputes. You might also negotiate partial credits or address only the most significant items.
Know When to Stand Firm: If requests seem unreasonable or exceed the home’s value relative to other available properties, be prepared to decline and potentially lose the sale.
Making Post-Inspection Decisions
After receiving the inspection report and any estimates, you’ll face several options:
Proceed as Planned: If findings are minor or expected, you might choose to move forward without requesting changes, especially in competitive markets.
Negotiate Repairs or Credits: Submit a reasonable request focusing on major issues, safety concerns, or items affecting insurability or value.
Renegotiate Purchase Terms: Consider requesting a price reduction instead of specific repairs, providing flexibility in addressing issues on your timeline.
Walk Away: If major problems exceed your comfort level or budget, exercising your inspection contingency might be the wisest choice. This is particularly relevant for issues like extensive foundation problems, major structural defects, or environmental hazards.
How Realty Department Can Assist You
Navigating the inspection process requires experience and expertise that Realty Department brings to every transaction. Our services include:
Inspector Recommendations: We maintain relationships with licensed, reputable inspectors who provide thorough, clear reports and excellent customer service.
Report Analysis: Our agents help interpret inspection findings, prioritize concerns, and develop negotiation strategies based on current market conditions and your specific situation.
Contractor Networks: We can recommend qualified professionals for estimates and repairs, ensuring you work with reliable, licensed contractors.
Negotiation Support: Our experienced agents guide you through post-inspection negotiations, helping achieve fair outcomes that protect your interests.
Timeline Management: We ensure all contingency deadlines are met while allowing adequate time for thorough evaluation and decision-making.
Conclusion and Next Steps
The home inspection process, while sometimes revealing unexpected issues, provides invaluable insight into your potential investment. By understanding what to expect, preparing properly, and approaching negotiations strategically, you can navigate this crucial step with confidence.
Remember that no home is perfect, and the goal isn’t to achieve perfection but to make informed decisions based on accurate information. Whether you’re buying your first home or selling a longtime residence, the inspection process serves as a vital checkpoint ensuring all parties understand the property’s true condition.
Ready to begin your home buying or selling journey? Contact Realty Department today to connect with experienced agents who will guide you through every step of the process, from initial property search through successful closing. Our commitment to client education and support ensures you’ll feel confident and informed throughout your real estate transaction.
For immediate assistance or to schedule a consultation, visit our website or call our office. Your dream home awaits, and we’re here to help you achieve your real estate goals with knowledge, professionalism, and peace of mind.
